21 Nov 2017
So you’ve finally received your Windows Mixed Reality headset that you’ve waited for so long only to find that your Surface Pro 4 doesn’t go past compatibility check. This is what you probably see on your screen right now:
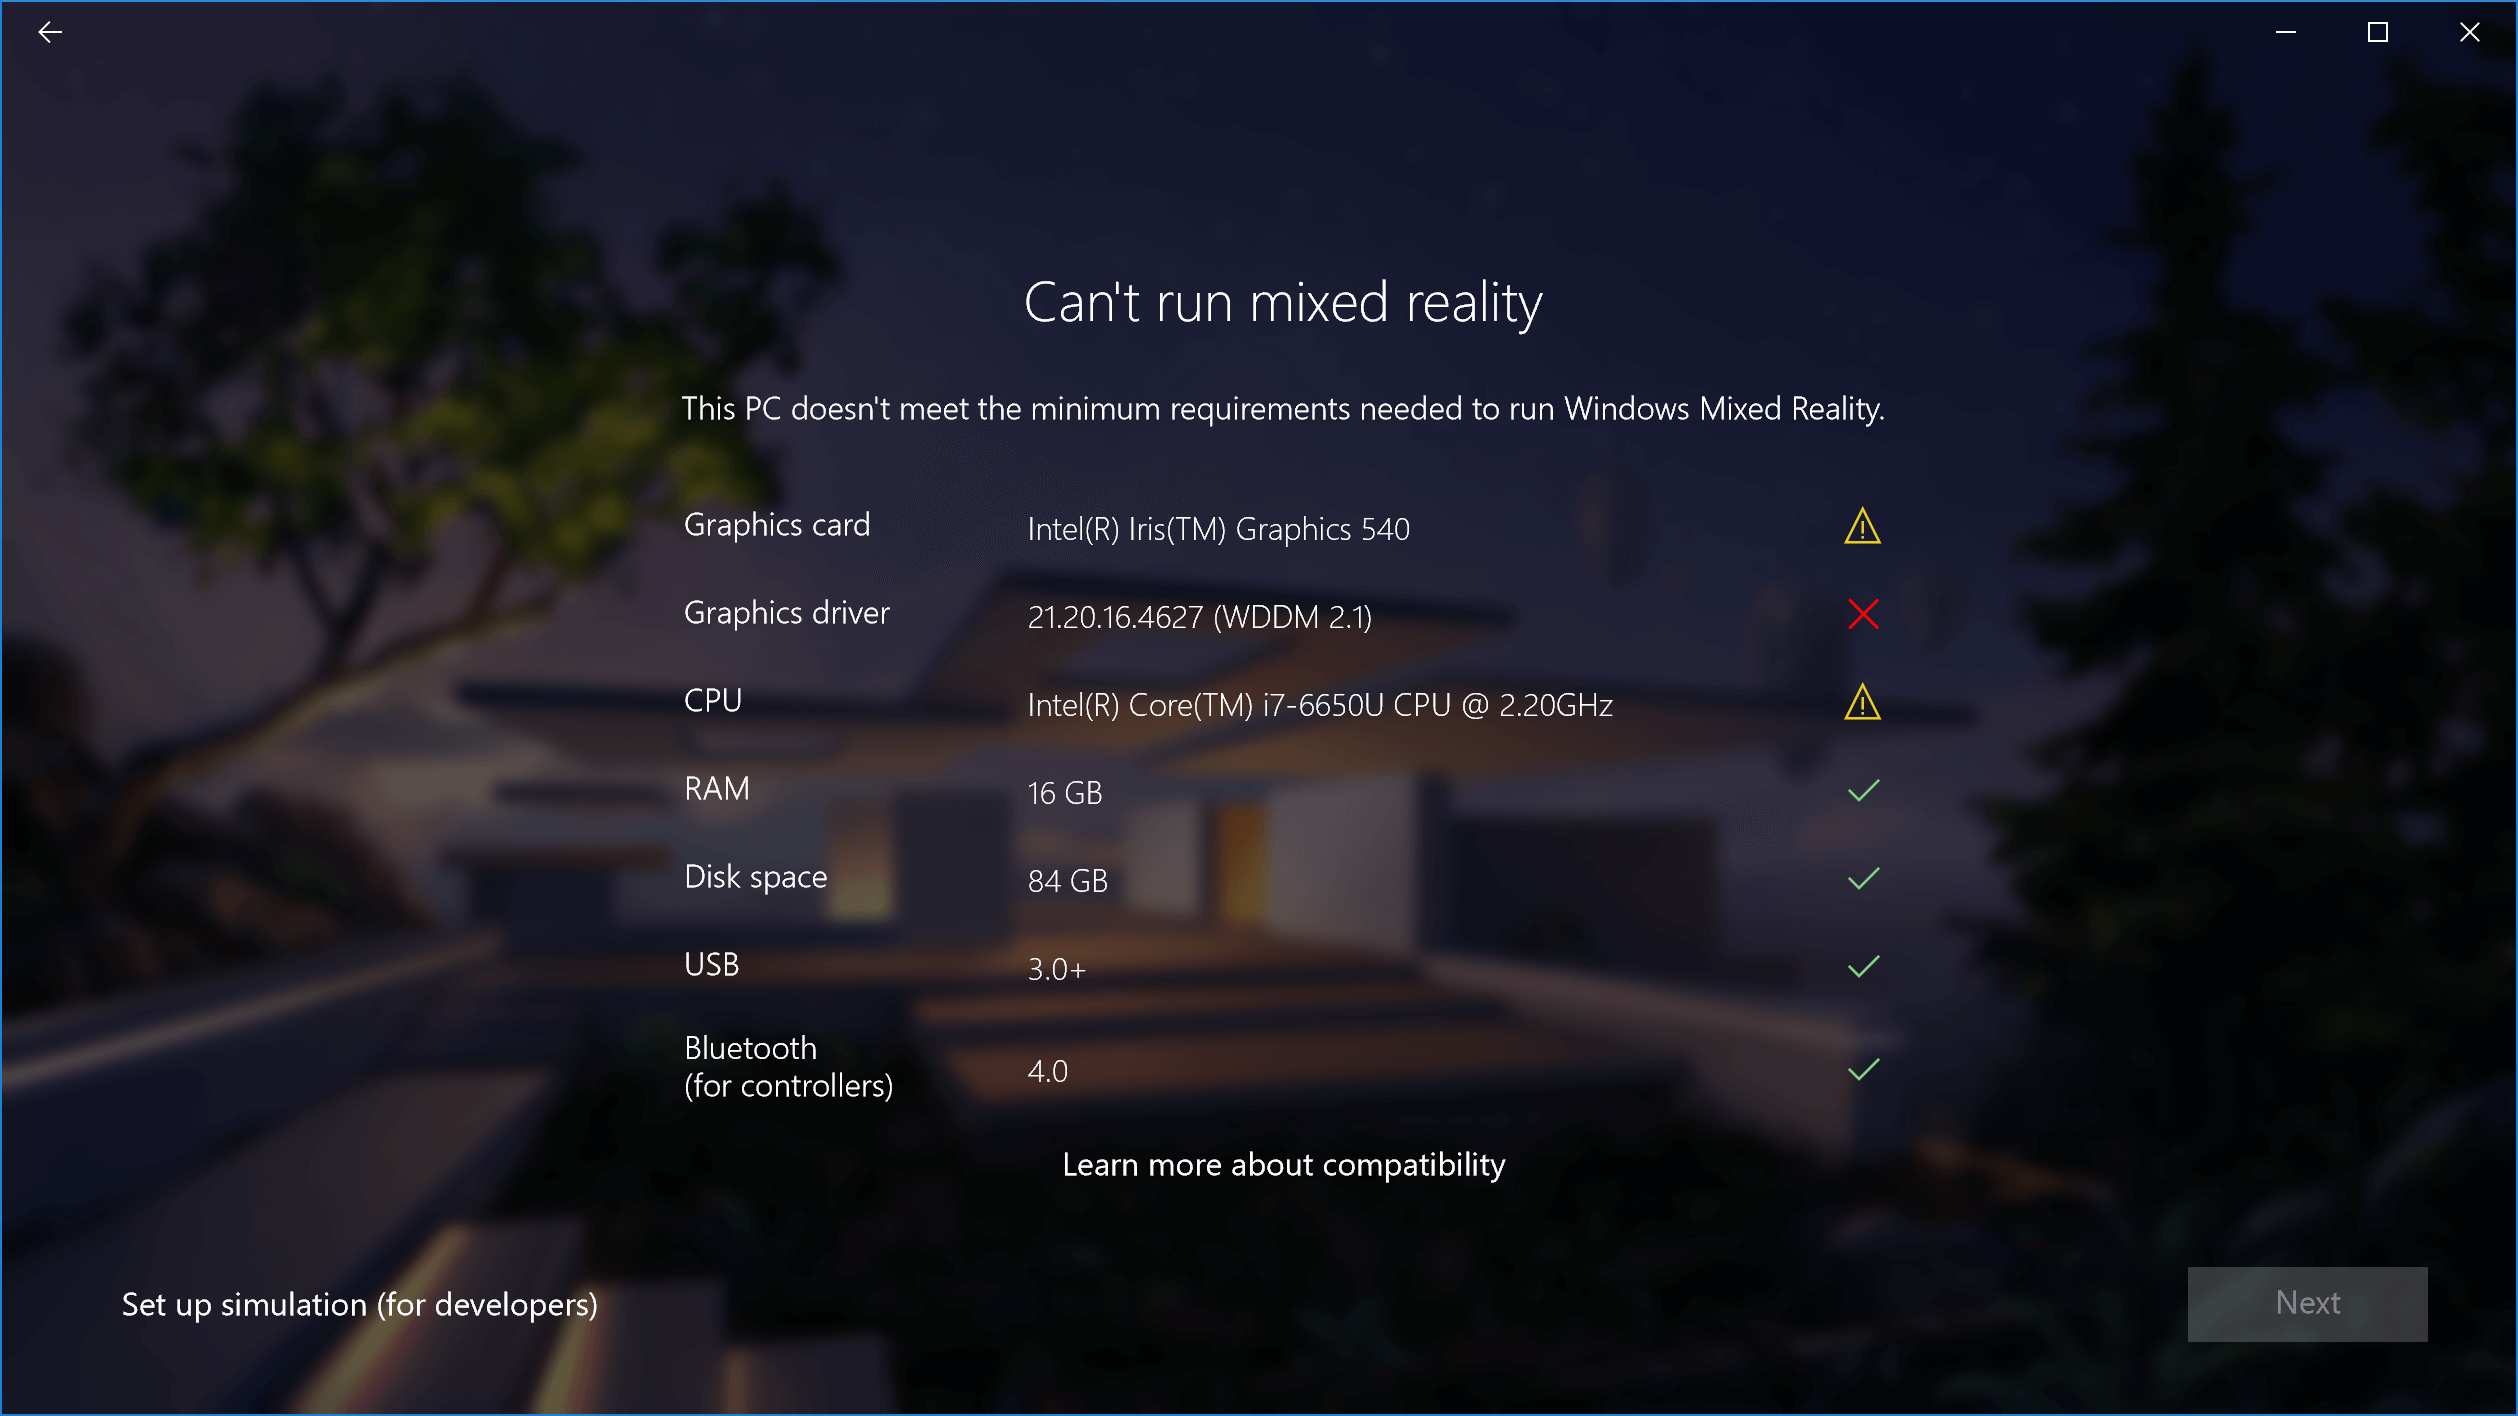
Graphics driver 21.20.16.4627 (WDDM 2.1) ❌. Ok you probably can just update the driver, right? You can just go to Intel drivers site and download new driver, right? Nope, you can’t do this ( at least at the moment when this article had been written you couldn’t) and apparently neither Microsoft nor Intel are planning to add support for WDDM 2.2 for Iris Graphics cards in any immediate future proof, proof.
Magical ‘fix’ that probably will stop working
Fortunately apparently you DON’T really need WDDM 2.2 to run Windows Mixed Reality, it works just fine on WDDM 2.1. All you need to do is tell Mixed Reality Portal that it’s no big deal that you have some problems and your driver doesn’t support WDDM 2.2.
In order to ‘force’ enable “NEXT” button event when your PC is supposedly not supported you need to make some changes in the registry. Disclaimer: I don’t guarantee that this method will work for you. I have no idea if this may damage yours PC/Headset (it’s not damaging my Surface as far as I can tell), but you should try this method only at your own risk. Stop here and wait for drivers if you are not ready.
Regedit
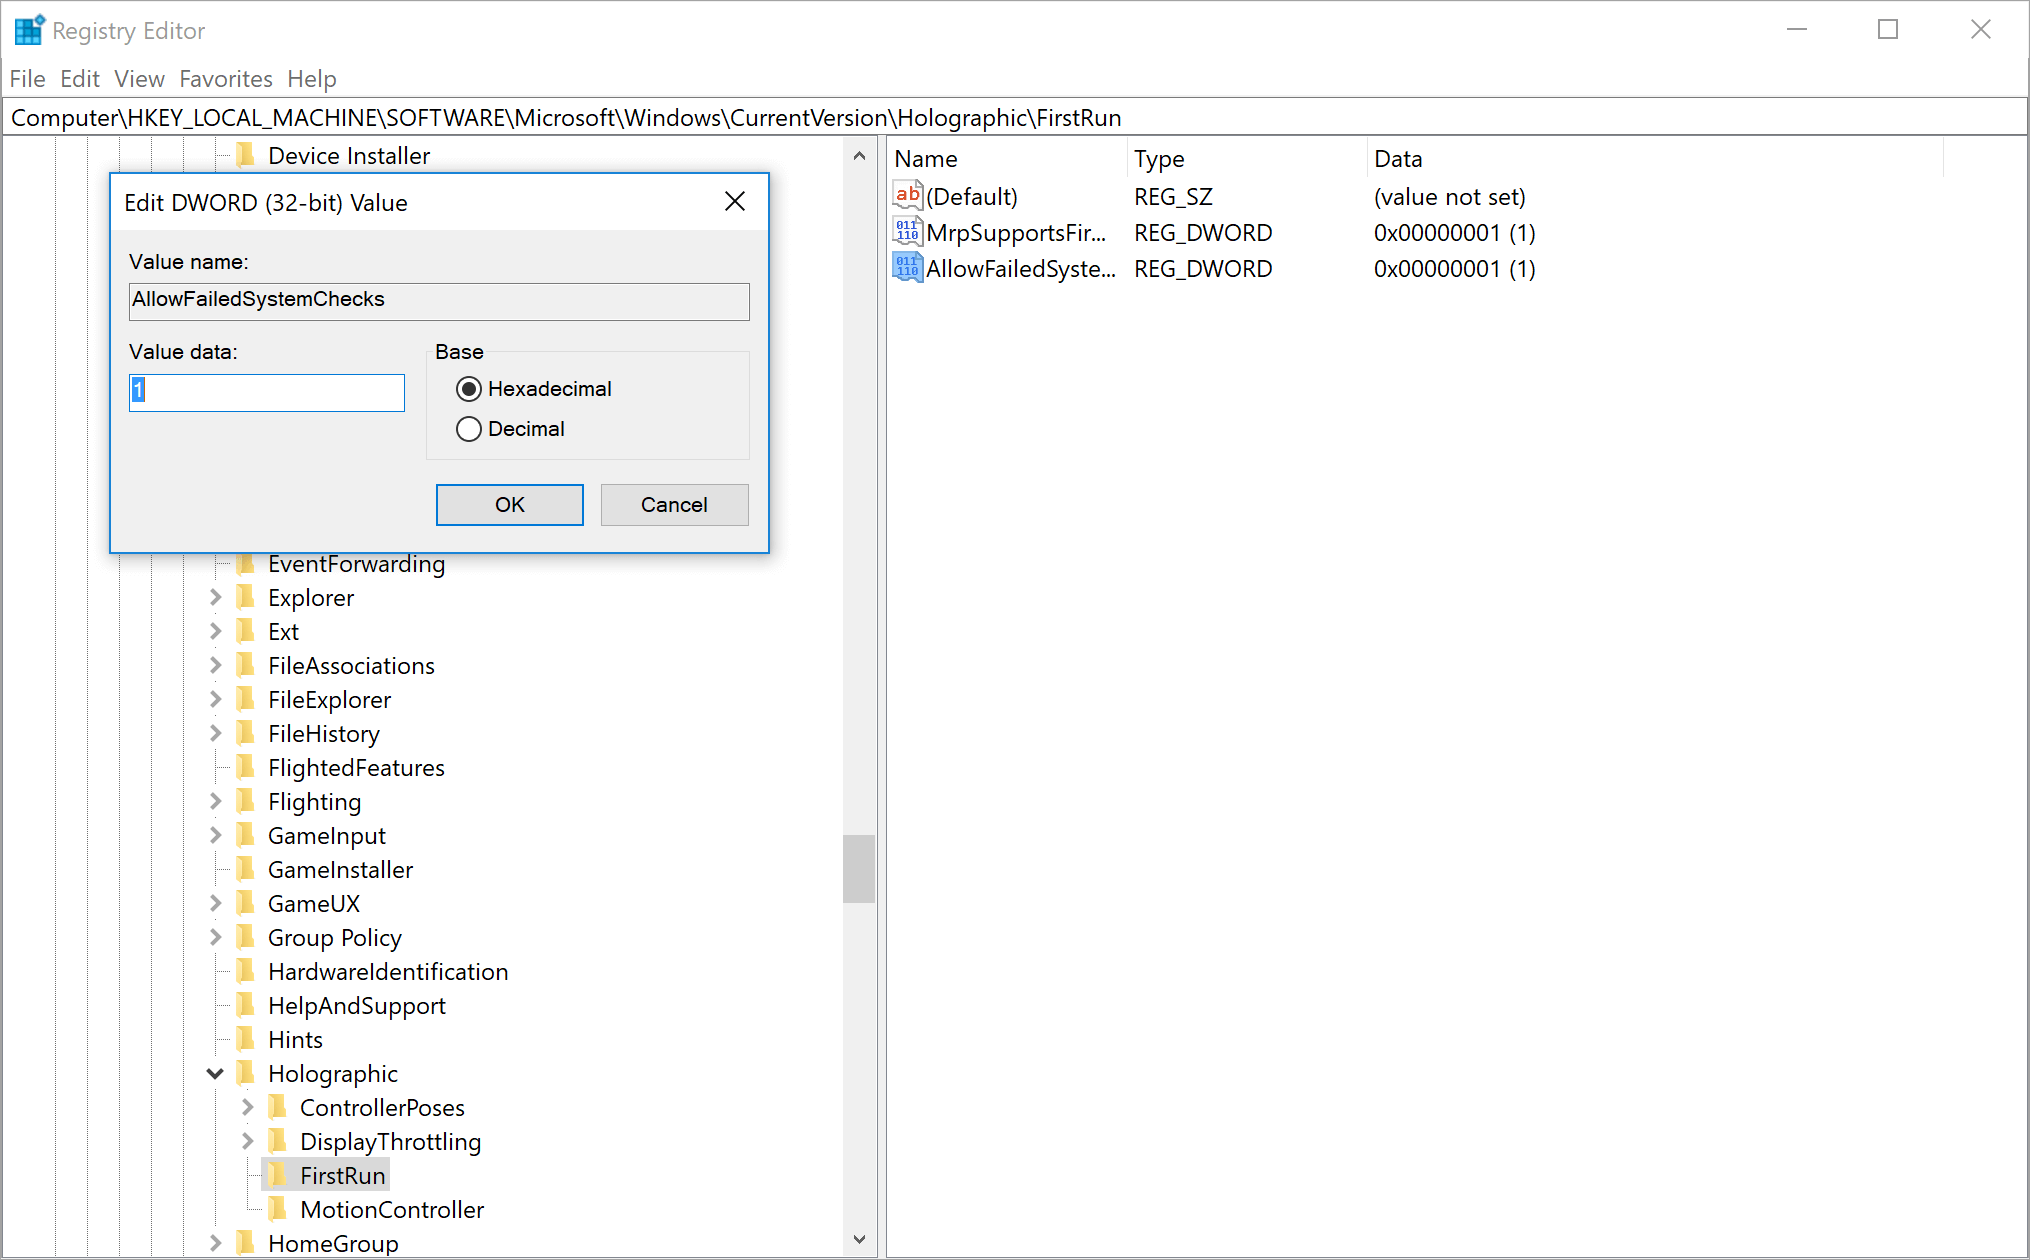
So you still want to try, do you? Let’s start. Press “Windows + R”, type “regedit” into the input and press “Enter”.
This will open Registry Editor. Navigate to HKEY_LOCAL_MACHINE\SOFTWARE\Microsoft\Windows\CurrentVersion\Holographic\FirstRun (just copy and paste this into the address bar at the top). Create a new DWORD (32-bit) value (via context menu) and name it AllowFailedSystemChecks. Double click it and set the value to 1.
Some other issues
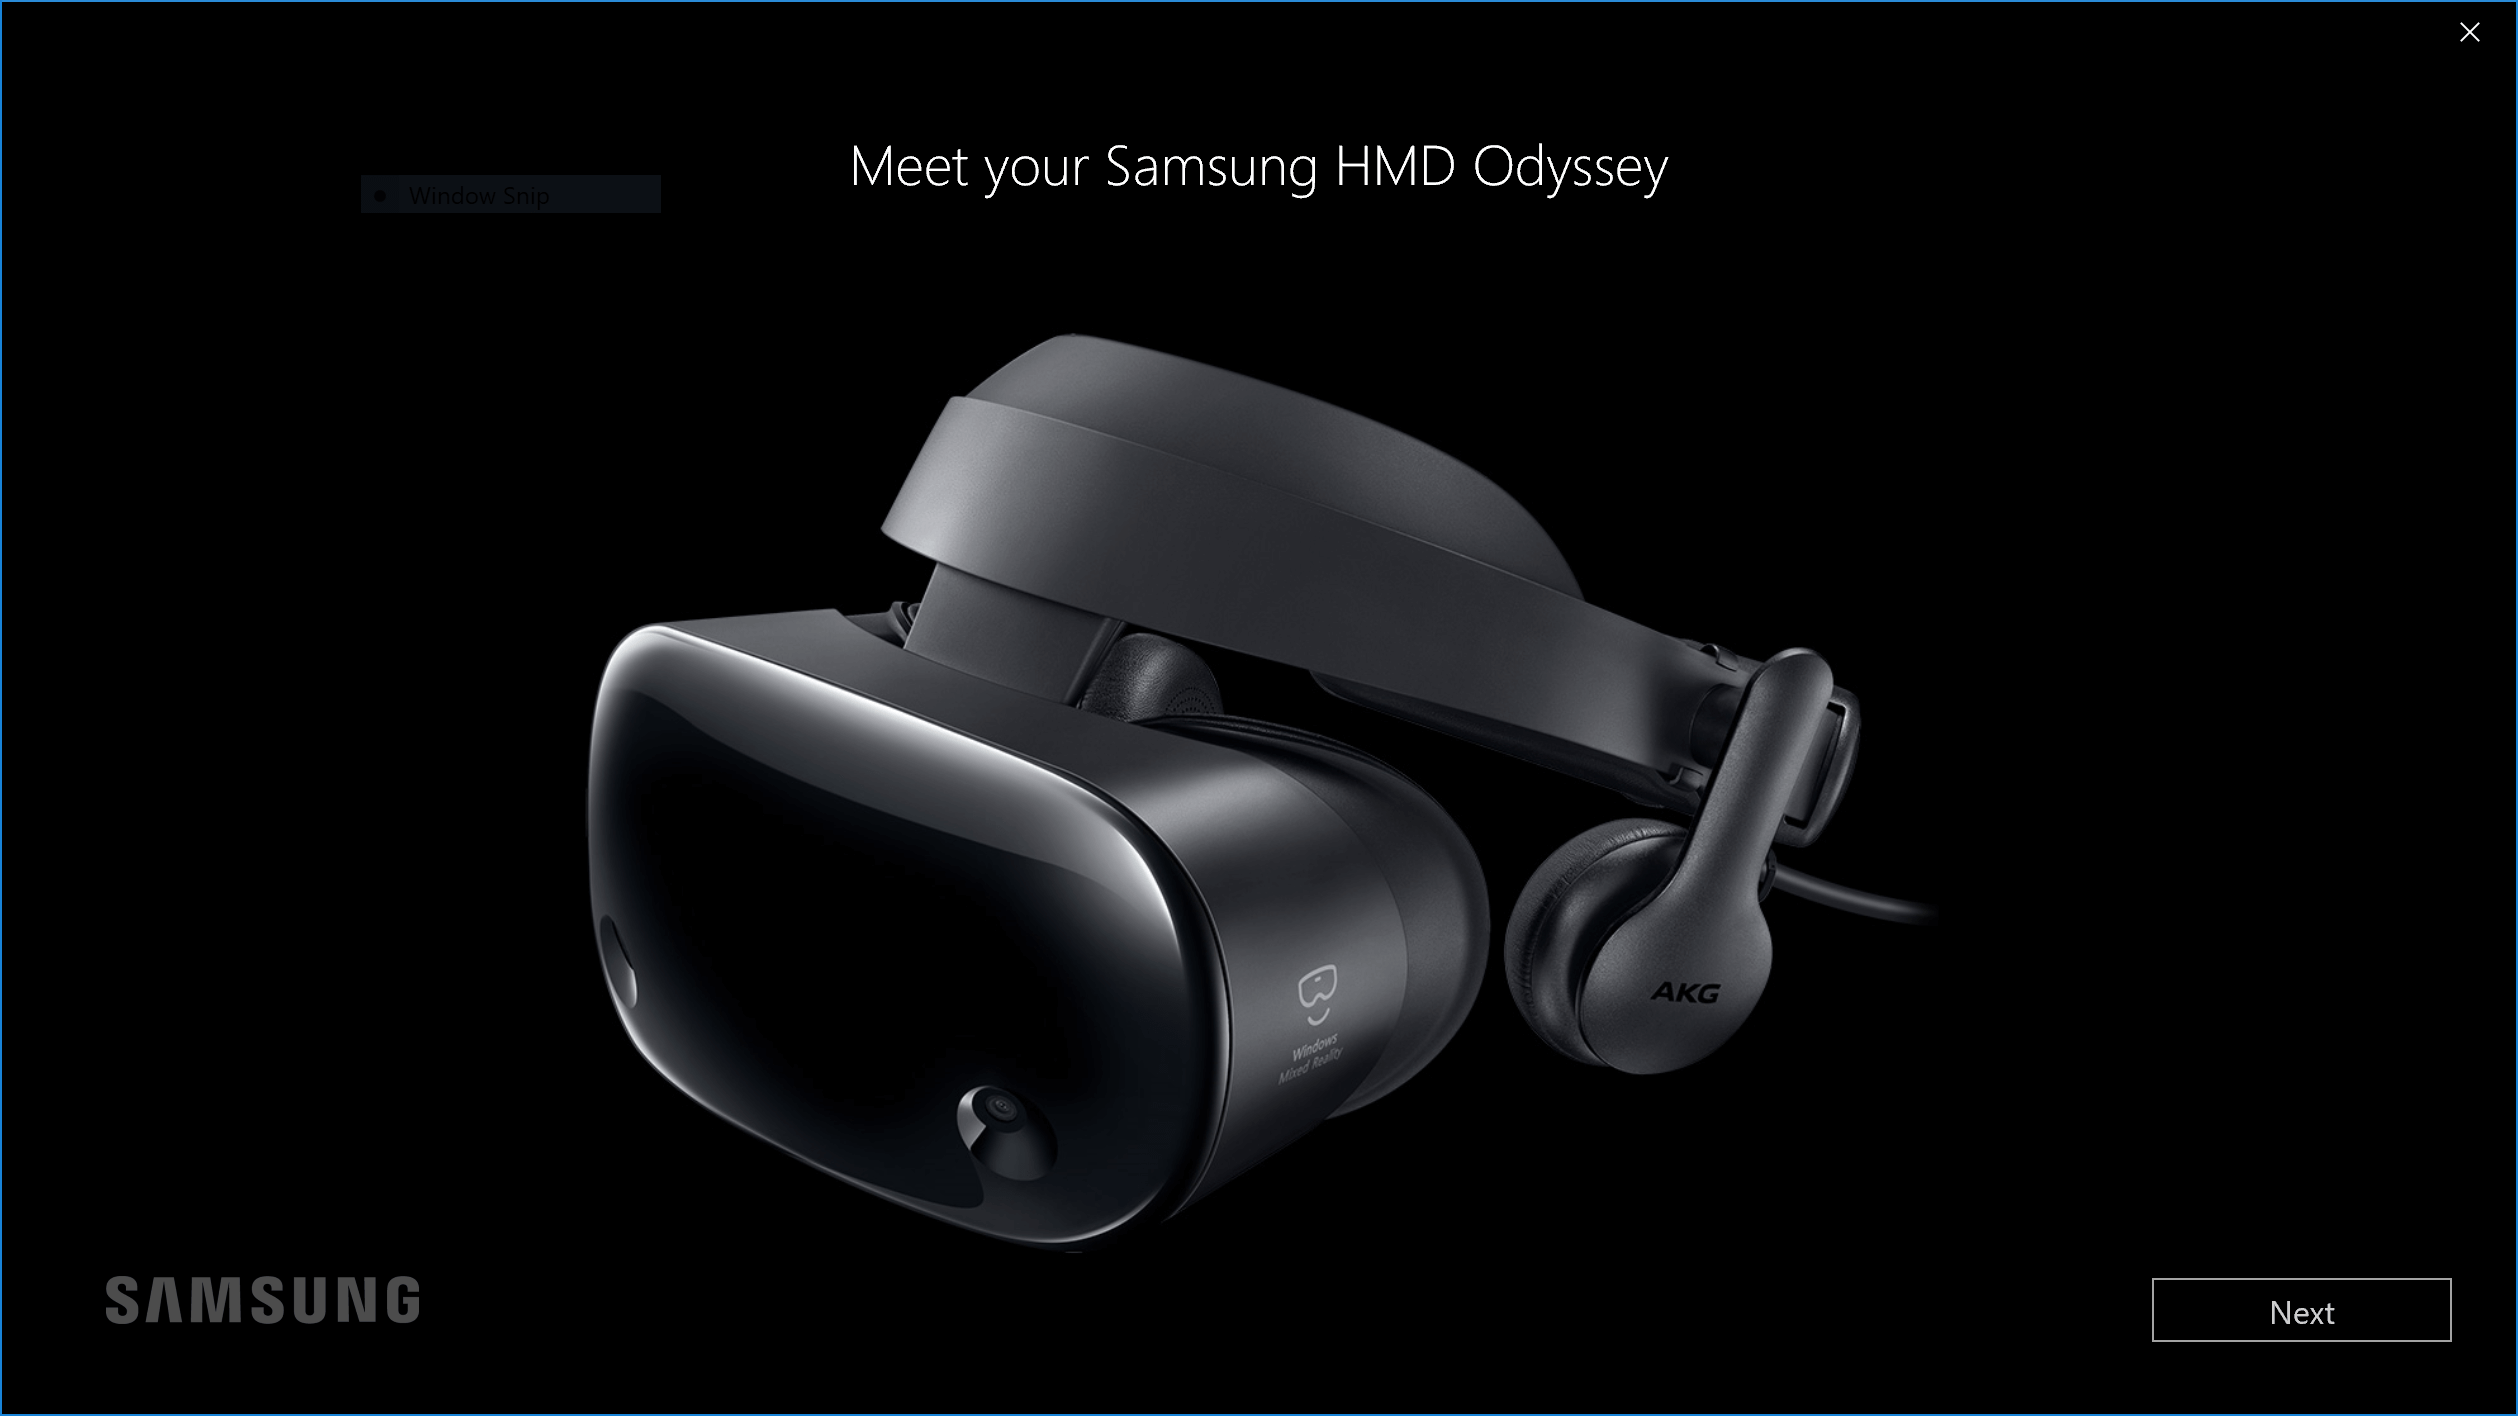
That’s it. Now You can restart Mixed Reality Portal and the “Next” button should be clickable. At this point, I was pretty confident that everything would work just fine. Mixed Reality Portal recognized my Samsung Odyssey headset,
and I had even set up boundaries.
But as soon as the Portal tutorial tried to start up my monitor began to flicker and no video displayed in the headset. The culprit was my cheap passive Mini DP to HDMI adapter. Microsoft has recomended list of adapters that they recommend but as long as your adapter is an active one and supports 4k output it should be fine. I’ve bough this one. With the proper adapter, everything finally began to work.
The overall experience in wmr on Surface Pro 4 is Ok. You for sure will not be able to game on it, but Cliff House experience works fine. Sometimes you can see some lag and controllers jitter a bit, but nothing critical.
13 Jul 2015
HC-05 is cheap yet capable and easy to use Bluetooth SPP (Serial Port Protocol) module and it can be used to control your
quadcopter which runs MultiWii. There is one catch though. Default Baud rate of HC-05 is 9600 and that’s a problem, because
MultiWii software expects serial input-output device to operate at 115200. Gladly it’s fairly easy to change Baud rate of HC-05
if you have USB-TTL adapter or Adruino. In this post I’ll show how to change Baud using USB-TTL adapter.
Requirenments
For this method to work you’ll need:
- USB-TTL adapter. I’ve used this one(FTDI Basic Breakout Arduino USB-TTL 6 PIN 3.3 5V):
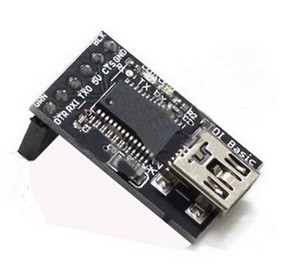 .
.
- Wires to connect HC-05 and USB-TTL.
- PC or Mac.
- Arduino IDE(We’ll need serial monitor only.)
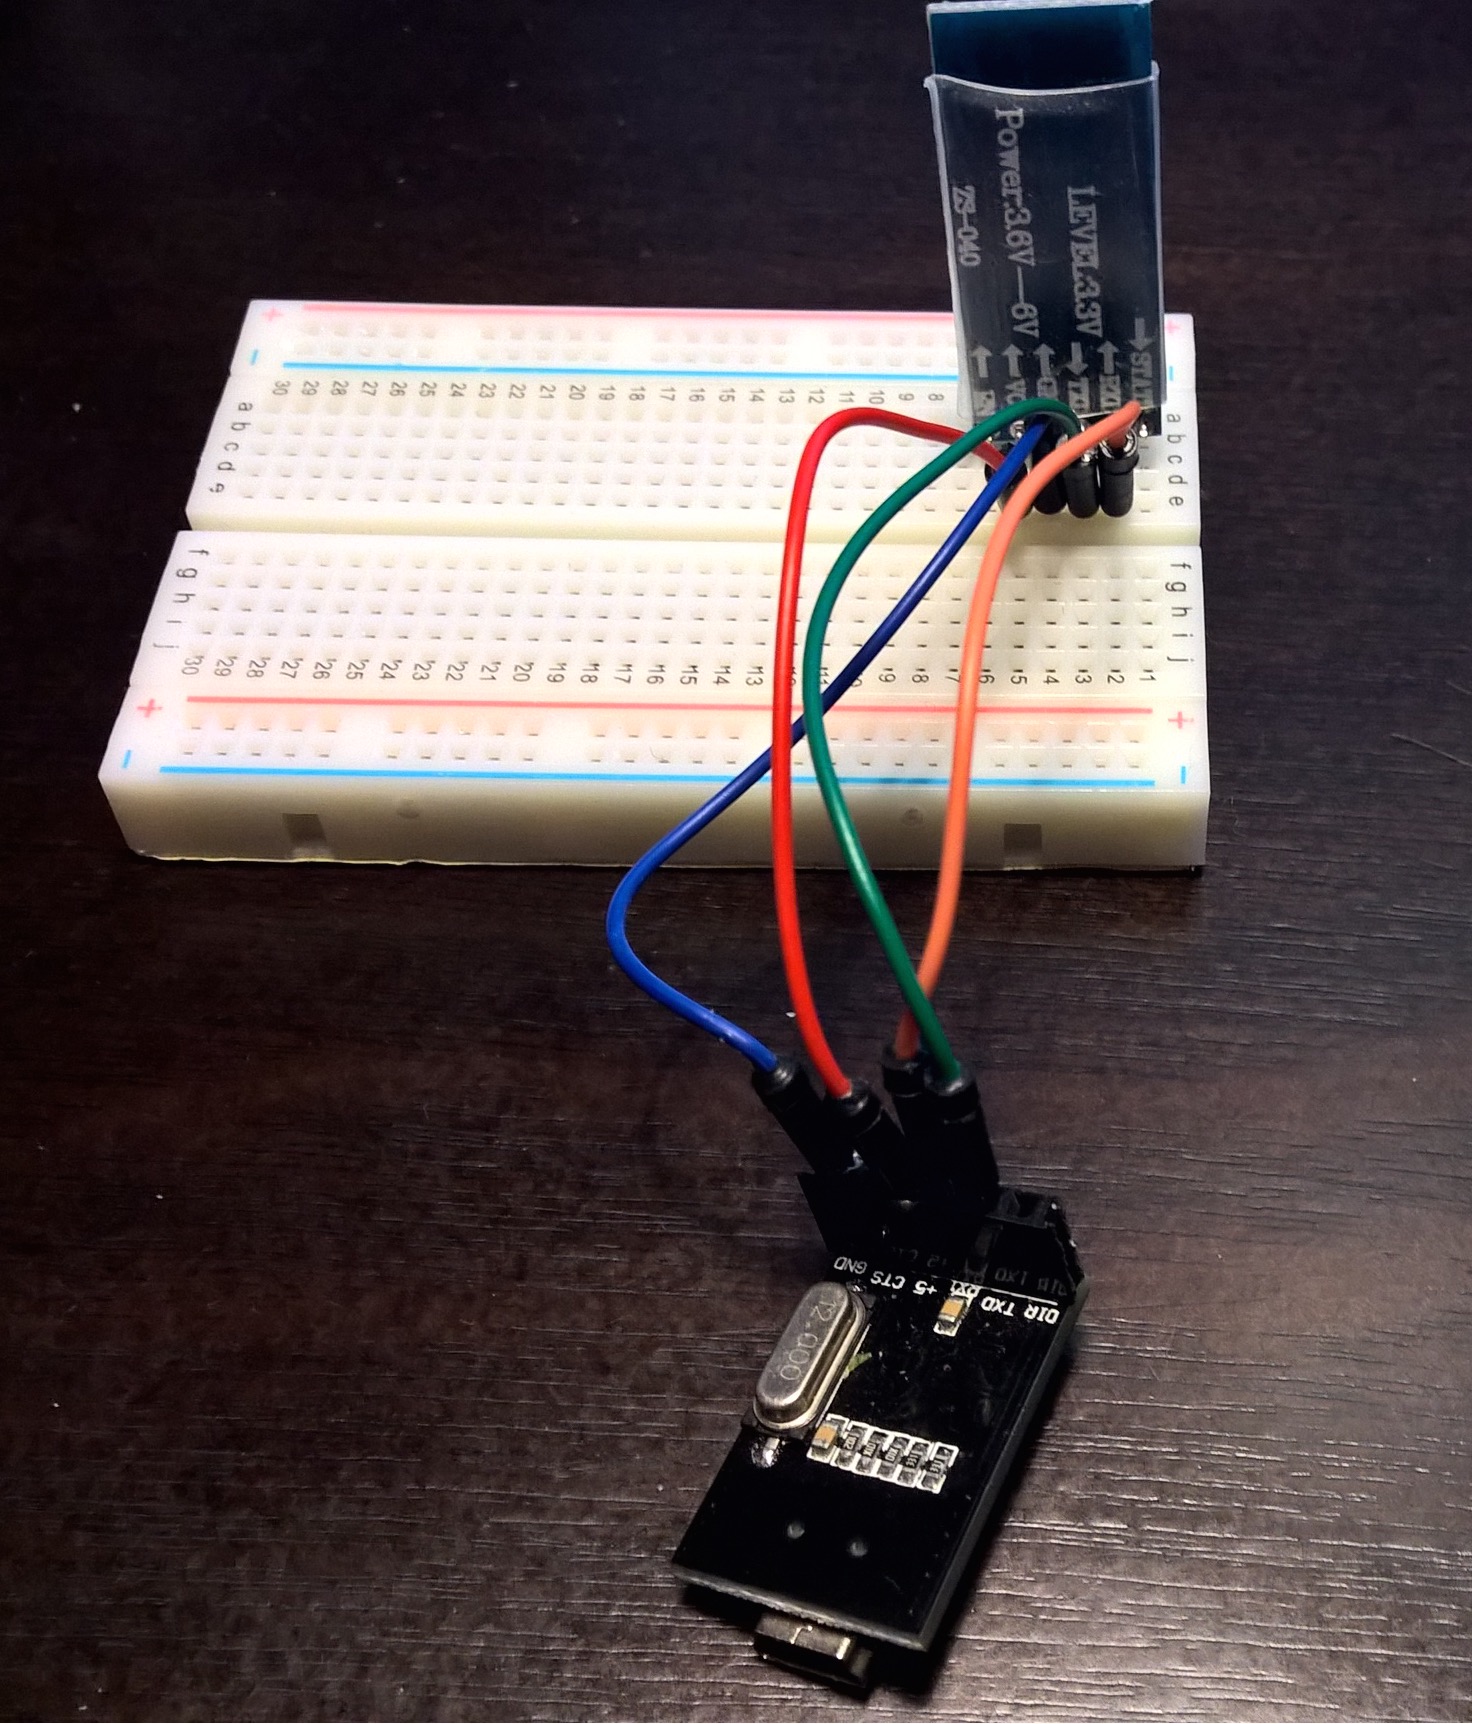
How to connect with FTDI
At first we need to connect HC-05 with USB-TTL adapter. Connect your HC-05 to match the table below:
| HC-05 |
|
USB-TTL adapter |
| TXD |
connect to |
TXD |
| RXD |
connect to |
RXD |
| GND |
connect to |
GND |
| VNC |
connect to |
+5 |
How to get to the AT mode
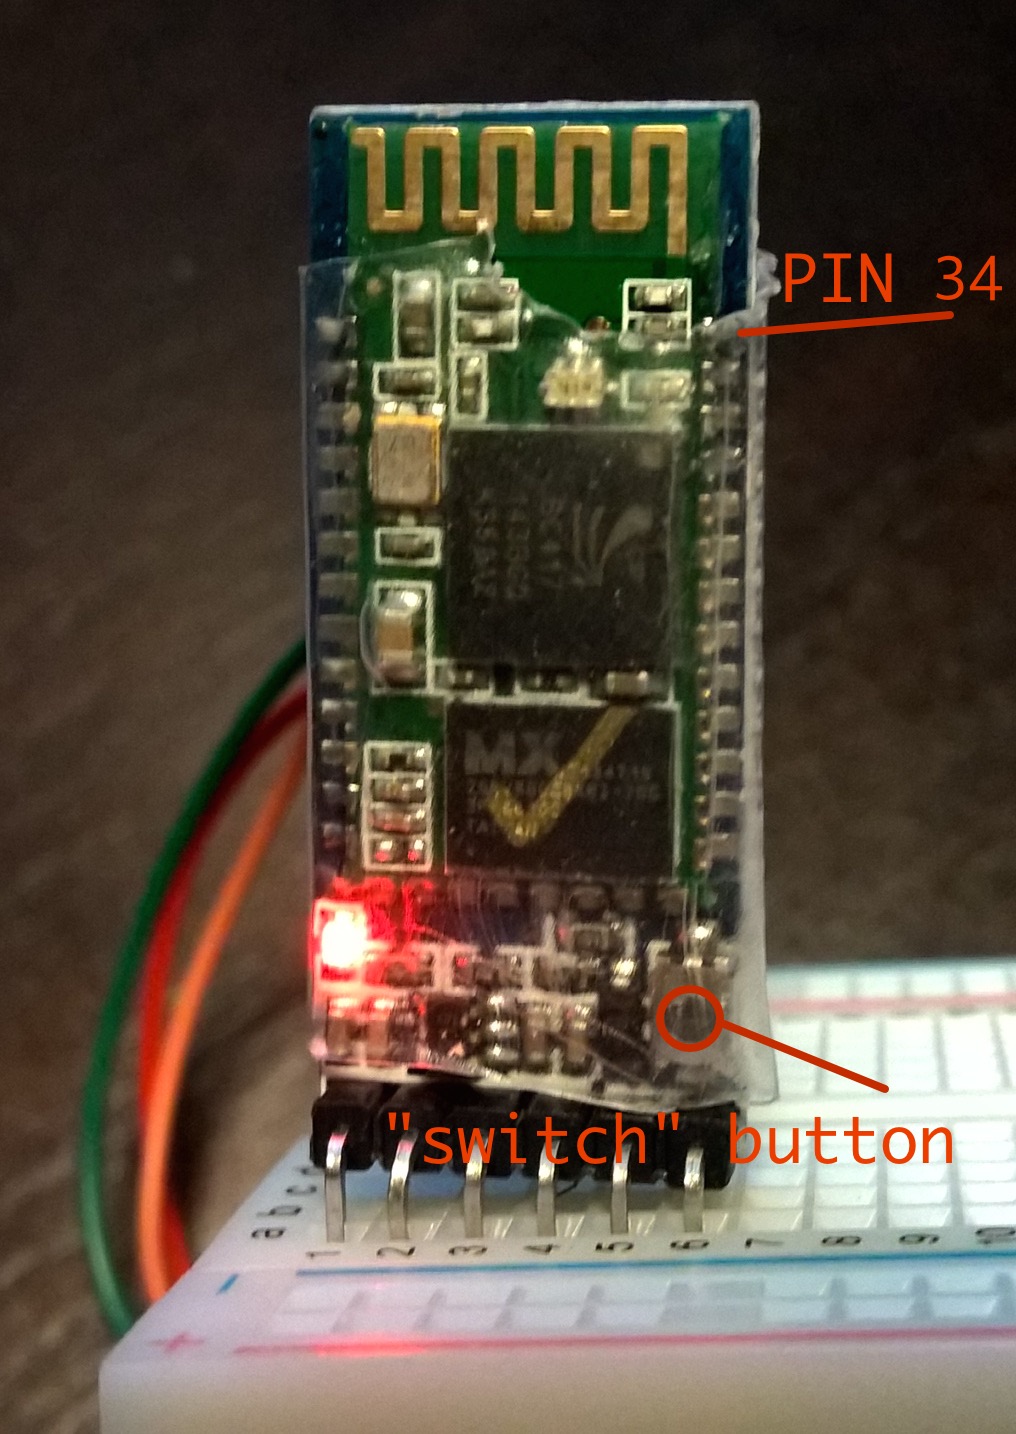
At first we need to find out which type of HC-05 breakout you have: with or without “switch” button. If you have HC-05
with “switch” button then to enter AT mode just press and hold “switch” button before powering USB-TTL adapter. HC-05 will
slowly blink every 2 seconds to indicate that it’s in AT mode. If there is no “switch” button you’ll need to hot wire PIN
#34 on HC-05 before powering USB-TTL adapter. And again after powering HC-05 will slowly blink every 2 seconds to
indicate that it’s in AT mode.(I’ve used second method before I realized that my HC-05 actually had “switch” button for that)
To summarize this are the steps to enter into AT mode:
- Step 1: Press and hold “switch” button
- Step 2: Supply power to USB-TTL. Then the HC-05 will enter to AT module.
- Step 1: Connect PIN34 to the power supply PIN(VCC).
- Step 2: Supply power to USB-TTL (the PIN34 is also supplied with high level since the PIN34 is connected with
power supply PIN). Then the HC-05 will enter to AT module.
Chaning Baud rate in Arduino IDE Serial Monitor
Now we just need to open Arduino IDE and change Baud rate.
- Step 1: Download Arduino IDE
- Step 2: Open Arduino IDE and select correct Serial Port (Tools->Serial Port->”SomePortGoesHere” (in my case it was /dev/tty.usbserial))
- Step 3: Open Serial Monitor (Tools->Serial Monitor)
- Step 4: Check that communication Baud rate is 38400, line endings are “Both NL and CR”.
- Step 5: Print “AT” to check that connection is OK.(Response should be OK)
- Step 6: Print “AT+UART” to see current Baud rate config
- Step 7: Print “AT+UART=115200,0,0” to set new Baud rate(first param 115200 - Baud rate(bits/s), second param 0 - stop bit(0—1 bit, 1—2 bits,
0), third param 0 - parity bit(0—-None, 1—-Odd parity, 2—-Even parity))
- Step 8: Print “AT+UART” to check current Baud rate config
 .
.
That’s it. We’ve changed the Baud rate of HC-05. Now we can use it with MultiWii.
In case you’ll want to change some other HC-05 config(bluetooth name, passkey, etc) here is list the of AT commands:
HC-05 AT command set